
Last Updated: October 30, 2026
Quick Summary
A science assembly works best when you treat it as instruction rather than entertainment, matching the program to your grade bands and planning logistics backward from the date. Standard elementary assemblies run 45 minutes, and keeping groups under roughly 250 students for hands-on programs preserves participation. Confirm insurance, accessibility needs, and your final session count at least two weeks out to avoid day-of surprises.
- Students leave a good assembly with a question, so pair it with a writing prompt or library display.
- Ask one direct question before booking: do the students touch anything?
- A 45-minute assembly often requires 30-45 minutes of setup and a similar teardown window.
- Spend 15 minutes on vocabulary, question goals, and expectations in the week before.
- Normalize competing quotes to cost per student per session before deciding.
Table of Contents
- Why a Science Assembly Belongs on Your School Calendar
- Science Assembly Ideas for Elementary Schools That Fit Your Grade Levels
- Hands-On Demonstrations and Experiments That Make Concepts Stick
- How Long Should a Science Assembly Be?
- Your Elementary School Assembly Planning Checklist
- How to Prepare Students for an Assembly
- Evaluating a Presenter Before You Book
- Budgeting, Safety, and Accessibility Details That Get Overlooked
- Measuring Learning Outcomes and Following Up After the Assembly
- Book Your Science Assembly with Dinosaurs Rock
- Frequently Asked Questions
Why a Science Assembly Belongs on Your School Calendar
A science assembly planning guide starts with one question: what does a school actually get from 45 minutes in a gym? The answer is not “a break from the schedule.” A well-built assembly gives students a shared reference point that teachers can pull from for weeks afterward, and it gives your building a single event that reaches every grade at once.
Here is the part most schools get wrong. They book an assembly as a reward, then wonder why it leaves no trace. Assemblies work best when they are treated as instruction, not entertainment.
What Students Actually Take Away
The strongest takeaway is a question. Students leave a good science assembly wanting to know why something happened, and that curiosity carries into reading, writing, and classroom discussion. Many schools find that pairing an assembly with a follow-up writing prompt or a library display on the same topic extends the effect well past the event itself.
A second takeaway is vocabulary. Terms like density, fossil, and air pressure stop being abstract when a student has watched them demonstrated in front of their face.
Science Assembly Ideas for Elementary Schools That Fit Your Grade Levels
The best science assembly ideas for elementary schools are the ones matched to your grade bands, not the ones with the flashiest description. A kindergarten audience and a fifth-grade audience need different pacing, different vocabulary, and different amounts of explanation.
Think in two tracks. For younger grades, prioritize visual change and repetition: color shifts, loud reactions, things that appear and disappear. For upper elementary, add the “why” behind each demonstration so students can connect it to what they already know.
Subject Areas to Choose From
Most programs draw from a handful of core areas. Decide which one aligns with what your teachers are covering this term.
- Astronomy: scale of the solar system, craters, phases of the moon
- Chemistry: reactions, states of matter, safe color-change demonstrations
- Physics: flight, speed, Bernoulli’s principle, gravity and motion
- Life science: fossils, adaptation, food chains, prehistoric life
- Earth science: rocks, minerals, erosion, gemstones and how they form
STEM and STEAM themes work well as a wrapper around any of these. A STEAM framing adds an art or design prompt, which suits schools looking to connect the assembly to a maker project or a hallway display.
Hands-On Demonstrations and Experiments That Make Concepts Stick
Hands-on demonstrations beat explanations because students remember what they touched. The demonstrations that stick share three traits: students can see the result immediately, they can predict what will happen first, and there is a physical object involved that they can handle.

A common mistake is booking a program where students only watch. Ask one direct question before you sign anything: do the students touch anything? If the answer is no, you are paying for a lecture with props.
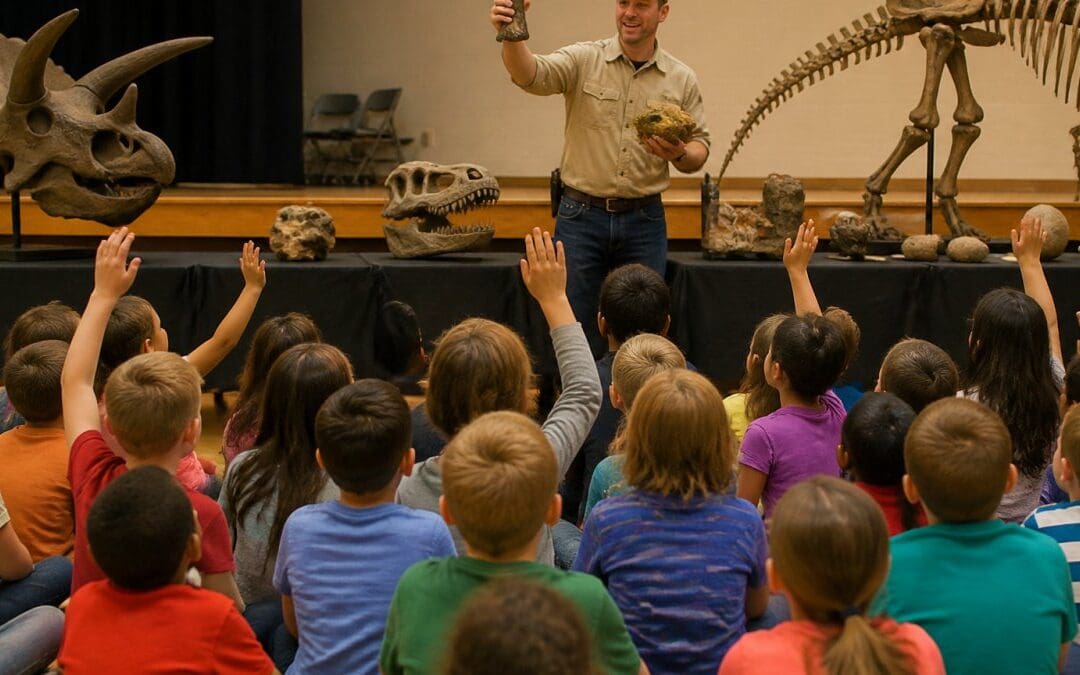
At Dinosaurs Rock, every child digs up and keeps genuine specimens, which turns a demonstration into something students take home and show their families. That matters more than it sounds. A fossil in a backpack gets discussed at the dinner table, and that conversation is where the learning gets reinforced.
How Long Should a Science Assembly Be?
A science assembly duration of 45 minutes is the standard format for elementary audiences, and it is the length most schools find easiest to schedule. It fits inside a single class period, keeps attention high, and leaves room for questions at the end.
Shorter formats of 30 minutes work for younger grades or for schools running multiple back-to-back sessions. Longer all-day programs suit schools that want the presenter to work with several grade bands across the day rather than one large group.
Booking a single assembly for the whole building often means 400 or more students in one room, which can limit audience participation. Two shorter sessions often work better than one long one.
Your Elementary School Assembly Planning Checklist
An elementary school assembly planning checklist keeps the logistics from landing on one person at the last minute. Work backward from the date and assign an owner to each item. The table below is a starting template; adjust the lead times to your district’s purchasing and facilities rules.
| Timing | Task | Owner |
|---|---|---|
| 8-12 weeks out | Confirm date, grade bands, and budget | Administrator |
| 8-12 weeks out | Contact presenters and request availability | PTA or coordinator |
| 6-8 weeks out | Book presenter and sign agreement | Administrator |
| 4 weeks out | Confirm venue and equipment needs | Facilities staff |
| 3 weeks out | Send schedule to teachers, collect questions | Grade-level leads |
| 1 week out | Confirm arrival time, parking, unloading access | Front office |
| Day before | Remind students of expectations | Teachers |
| Day of | Assign staff greeter and room monitor | Coordinator |
| 1 week after | Collect teacher feedback and follow-up work | Administrator |
Venue, Equipment, and Audience Size
The gym is the default, but it is not always the best room. A gym echoes, and sound quality drops fast with a large crowd. A cafeteria or multipurpose room with a lower ceiling often works better for audience participation because voices and reactions stay contained. Use this venue decision checklist before you lock the room:
- Seating layout: Confirm whether students sit on the floor, in chairs, or at tables. Floor seating works for large groups but limits students with mobility needs; chairs or benches take more space but improve sightlines.
- Sightlines: Walk the back row. If a student in the last row cannot see a tabletop demonstration, the room is too deep or the stage is too low. A raised platform or a presenter who moves into the audience solves most sightline problems.
- Sound: Hard walls and high ceilings create echo. Ask whether the presenter uses a microphone and whether the room has a built-in sound system. For groups above roughly 200 students, a microphone is usually necessary for questions to be heard.
- Power access: Confirm the location of outlets and whether extension cords are allowed under your facilities policy. Presenters who bring equipment often need one dedicated circuit near the demonstration table.
- Setup and teardown time: Ask how long the presenter needs before and after the program. A 45-minute assembly often requires 30-45 minutes of setup and a similar teardown window, which affects lunch and recess schedules.
- Unloading access: Confirm the nearest door to the parking area, whether carts can roll through, and whether stairs or thresholds block wheeled cases. A loading dock or side entrance saves time and reduces disruption.
Audience size deserves its own decision. A single assembly for the whole building often means 400 or more students in one room, which kills audience participation and makes questions hard to hear. Two sessions of 45 minutes usually beat one session of 90 because each group gets a closer view and more chances to volunteer. As a rule of thumb, keep groups under roughly 250 students for hands-on programs and under roughly 400 for demonstration-only formats, and confirm the presenter’s preferred maximum before you assign grades to sessions. Matching these capacity constraints to the specific needs of your curriculum ensures that the chosen science training programs remain effective and engaging for every student in attendance.
Equipment needs vary by program, so ask the presenter directly rather than guessing. Typical requests include a sturdy table, access to power, a microphone for large rooms, and a clear unloading path from the parking area. Confirm audience size in advance so the presenter can plan the number of demonstrations and specimens.
Accessibility deserves a spot on the checklist too. Reserve front-row floor space for students who use wheelchairs or need to sit close, confirm the presenter can be heard by students with hearing accommodations, and ask whether visual materials are large enough to be seen from the back row. If your school has a sensory-sensitive population, ask the presenter whether any demonstration produces sudden loud sounds or bright flashes, and arrange a quiet alternative space for students who need it.
Build a one-page venue sheet for the presenter: room name, door number, unloading route, outlet locations, microphone availability, setup window, and a staff contact cell number. Presenters who receive this in advance arrive calmer and set up faster.
How to Prepare Students for an Assembly
Preparing students before the assembly roughly doubles what they get out of it. Teachers who spend 15 minutes on context and expectations see far more participation than classes who walk in cold.
Try this three-step routine in the week before:
- Prime the vocabulary. Introduce four or five terms the presenter will use, so students recognize them in the moment.
- Set a question goal. Ask each student to write one question they hope gets answered.
- Review expectations. Explain how questions will be handled and what students should do if they want to volunteer.
After the assembly, give students five minutes to write down one thing they learned and one thing they still wonder about. That single index card becomes your evidence of impact.
Evaluating a Presenter Before You Book
Evaluating a presenter comes down to five questions, and you should ask all of them before signing anything.
- What do students physically handle? Vague answers here are a warning sign.
- How is the program adjusted by grade level? A presenter who gives the same show to kindergarten and fifth grade is not differentiating.
- Are the specimens real? Ask directly. If a program advertises museum-grade materials, confirm what students actually keep.
- What is the backup plan? Ask what happens if equipment fails, a session runs long, or the room changes.
- Can you provide recent references? Ask for schools or groups from the past year or two and call one.
What most guides miss is the age-span question. If you have a 4-year-old and an 11-year-old in the same room, ask how the presenter keeps both engaged. Good programs handle mixed ages by layering explanation, not by aiming at the middle and hoping.
Budgeting, Safety, and Accessibility Details That Get Overlooked
Budgeting for an assembly means looking past the quoted fee. Build a line-item view before you commit, and treat the presenter’s quote as one line among several:
- Presenter fee (often quoted per session, not per day)
- Travel or mileage, if applicable
- Substitute coverage if staff attend
- Materials for follow-up classroom activities
- PTA or grant funding source
Pricing depends on the number of sessions, the date, and travel distance, so request a quote from Dinosaurs Rock for current pricing. Ask directly whether a quote is per session or per day, because the difference changes your cost per student. Fund through PTA budgets or science enrichment allocations where they apply, and confirm the rules with your district office before you count on any source. If you are comparing two quotes, normalize them to cost per student per session so a cheaper-looking single session does not beat a multi-session day that reaches every grade.
Safety is mostly the presenter’s job, but your school shares it. Confirm the program carries liability insurance and ask for a certificate of insurance before the event; your district risk manager may require it on file. Ask whether any demonstration involves heat, chemicals, or allergens, and share your school’s visitor policy in advance. For hands-on programs, ask how specimens are cleaned and whether any materials are choking hazards for younger grades. If a demonstration uses food or food-adjacent materials, confirm allergen handling with your school nurse.
Accessibility planning should start before the presenter arrives. Ask about microphone use, seating for students with mobility needs, and whether visual materials are large enough to be seen from the back row. For students with hearing accommodations, confirm whether the presenter can provide a written outline or captioned visuals. For students with sensory needs, ask whether the program includes sudden loud sounds, bright lights, or strong smells, and plan a quiet alternative space. If your school has a sign language interpreter on staff, confirm the interpreter’s sightlines to the presenter and to the students.
Do not assume the presenter’s insurance covers your venue. Ask for the certificate of insurance at booking, not the week of the event, and route it through your district’s risk management process if required.
A practical way to keep budgeting, safety, and accessibility from becoming last-minute scrambles is to assign each one an owner on the planning checklist and set a confirmation date. Schools that confirm insurance, accessibility needs, and the final session count at least two weeks out avoid most day-of surprises.
Measuring Learning Outcomes and Following Up After the Assembly
Measuring outcomes does not require a formal assessment. Three lightweight signals tell you whether the assembly was worth the money and the schedule disruption.
First, teacher feedback. A two-question form sent the same week captures more than a survey sent a month later. Second, student artifacts: the index cards, drawings, or writing samples produced afterward. Third, demand signal: how many students ask for science books on the topic in the following weeks.
Follow-up is where most schools leave value on the table. Pull a cart of science-related reading into the library, display it for two weeks, and tell teachers the titles. Send a short note home describing what students saw and suggesting one question families can ask at dinner.
The National Science Teaching Association’s guidance on science education is a useful starting point for connecting an assembly to your existing curriculum goals rather than treating it as a standalone event. Schools that align the assembly with units already in progress get more classroom traction than schools that slot it in randomly.
For standards alignment, check the Next Generation Science Standards to see which disciplinary core ideas your chosen subject area touches, and share that mapping with teachers so they can reference it in lesson planning.
Book Your Science Assembly with Dinosaurs Rock
The hardest part of science assembly planning is not the checklist. It is finding a program that treats students as learners rather than an audience, and that gives them something real to hold onto when the presentation ends.
Dinosaurs Rock has run programs for over 10 million participants across 27 years, bringing genuine dinosaur fossils, gemstones, and interactive exhibits directly to schools. There are no costumes, no puppets, and no singing. Every child digs up and keeps authentic specimens, and our life-size, moving, roaring dinosaur exhibits give students a visual anchor they carry into classroom discussion. One school put it plainly: “The programs offered are absolutely OUTSTANDING. The kids were engaged, enthused, and totally engrossed in an educational experience.”
If you are weighing a field trip against bringing a program to your building, consider the logistics of each option.
Call us at (917) 375-4248 to check availability and get a quote for your dates, and we will help you match the program to your grade levels and schedule.
Frequently Asked Questions
How do you plan a science assembly for elementary students?
Start by setting a learning goal tied to your curriculum, then choose a program format and subject area that match your grade levels. Confirm the venue, audience size, and equipment needs, and build a planning timeline that starts six to eight weeks before the date. Send teachers prep materials so students arrive with background knowledge. Finally, plan a follow-up activity so the assembly connects back to classroom science lessons instead of standing alone.
How long should a school science assembly be?
Most elementary assemblies run about 45 minutes, which holds attention across grades without cutting into too much instructional time. Younger students in kindergarten through second grade often do better with a 30 to 40 minute format, while upper elementary and middle school audiences can handle 45 to 60 minutes. If you are booking an all-day program with multiple sessions, ask the presenter how they adjust pacing for each age group.
What should schools ask a science assembly provider before booking?
Ask what specimens or materials students handle, whether take-home items are genuine or replicas, and how the presenter adapts content for different ages. Confirm the space and equipment requirements, the setup and breakdown time, and what happens if a session runs long. Request references from schools that booked in the past year or two, and ask how the program ties to curriculum standards. Get the total cost in writing, including any travel fees.
How can teachers connect a science assembly to classroom learning?
Preview the assembly topic with a short reading assignment or a KWL chart so students arrive with questions. After the assembly, have students write or draw what they observed, then tie it to the unit you are teaching in earth science, physics, or life science. A simple follow-up like a classroom discussion or a specimen journal turns a one-hour event into a week of science-related reading and information gathering.
Can a science assembly work in a small space like a living room or library?
Many programs can be adapted for smaller settings. Ask the provider directly whether a program suits a group of about 15 kids in a living room or library room, and share the space details when you book. Share the room dimensions, seating arrangement, and whether there are stairs or elevator access when you book. Ask the provider whether they bring their own tables and how much floor space the demonstrations need.
How do you measure whether a science assembly was worth the cost?
Measure outcomes with a short pre- and post-assembly check: ask students a few questions about the topic before the program and again a week later. Track participation during the assembly, collect teacher feedback, and note whether students reference the assembly in later class discussions. Compare that against your learning goals. If the program sparked questions and follow-up reading, it did its job beyond entertainment.
Your calendar is set, your checklist is built, and your teachers know what to do before and after. The only remaining variable is the program itself. Get started with Dinosaurs Rock and give your students a science assembly they will still be talking about at the end of the school year.

